A conservation website.
Nest Boxes In Alberta
How to build nest boxes out of pallets.
This page assumes that you have a table saw and the skills to operate tools safely. Please be sure that you can do so safely. Some carpentry skills are certainly needed.
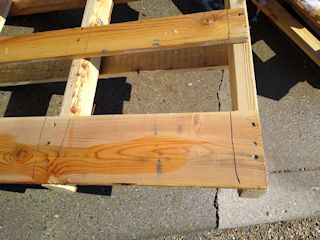
I first tried making a nest box out of a pallet and had a really useful house EXCEPT, I didn't realize that pallets are usually treated in some way.
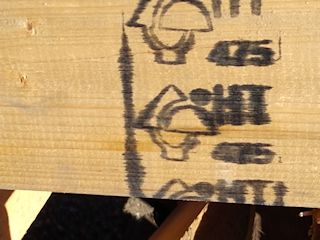
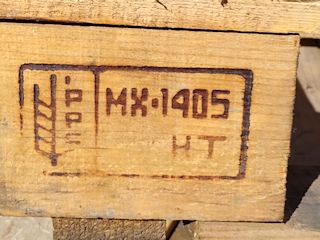
As in the above pictures there should be somewhere stamped HT on it. Those that have HT stamped on them were heated to kill any type of bug or disease. Those made in Canada also are not treated with chemicals, but others from else where in the world can have really nasty chemical treatment. This also applies to your health when roasting sausages on a fire. Be sure be safe for both yourself and the birds.
Sometimes I'm lucky and find a nice box made from spruce or pine plywood that is stamped HT.

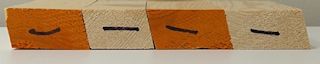
An easy way to take the pallets apart is to cut them of their framing members as in the following picture. The cuts are depicted by the felt pen lines. This helps to keep the wood from splitting.
The basic dimensions for a bluebird/swallow box, based on the fact that tree swallows need a lot more room to raise healthy young, are as follows:
5.5"x5.5" minimum floor area. A 6"x6" floor provides 16% more room for the babies. Enough space is critical to their health.
8" top of floor to center of hole/slot.
1 9/16" hole, this will exclude almost all starlings. However I did have one box with a 1 9/16" hole occupied by European Starlings.
15/16" slot, you can reduce it to 7/8" for tree swallows. Leave 2" above hole to make it easier for tree swallows.
1 3/16" slot for Mountain Bluebirds. Leave a 2" space above so that it would be easy for swallows to enter.
Do provide ventilation.
You will need a really good water proof glue. I use Titebond III Ultimate Wood Glue. It was referred to me by Timber Town.
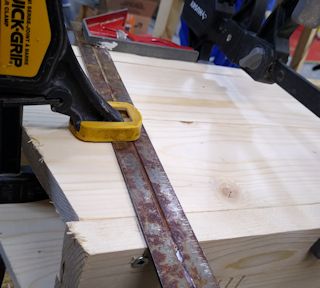
There is a correct way to glue up narrow boards to make wider boards. Assuming you are salvaging pallets, cut the sections between the pallet framing as the felt pen marks in the photo above. Cutting the pallets up like this helps to keep the wood from splitting and avoids unnecessary nail holes.
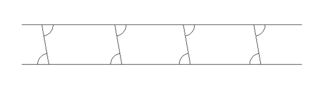
Then either edge the pieces with an edger or edge with a table saw. Put a felt pen mark on the one end of each piece. You will need to orientate all of the pieces the same way.
The next step is to trim one edge of each board on your table saw. Then after all are done narrow the cut by 1/16" or 1 or 2mm and trim the other edge of each board. Make sure you pay attention to the orientation, it must remain the same through the whole process. I keep the felt pen marks facing me.
The picture below is a mock-up to show what I mean. The saw blade was about 10 degrees from square and it is still possible to get a nice flat glue up.
You can now glue up the pieces, edge to edge. Note the board orientation. In the drawing below I exaggerate the angle, but because the orientation was always the same, the end product is flat.
Making the front slot is really easy if you are gluing pieces together. I ripped a piece in half the long way for the sides. Pay attention to the orientation and do it at the same time as you are edging the boards, without adjusting the blade angle. This will keep everything flat when glued.
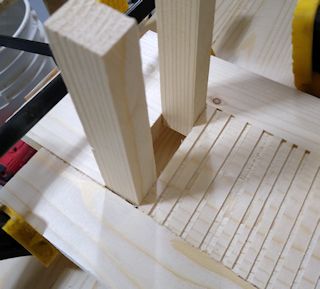
Next measure the bottom of the slot to the bottom of the front. Mark the board, you will want to put it back just as it was before you cut it. If you are out a tiny bit from square it will compound if you flip the pieces. Next, as in the below picture, make some saw cuts 1/8" or 2mm deep spaced 1/2" or 12mm for the birds to grip.
An alternate could be drilling a round hole. In Alberta where I am located we have Mountain Bluebirds, which require a 1 9/16" or 39mm hole. It is very important not to make it larger than this, because starlings will be able to enter. And remember that this hole is inviting to house sparrows.
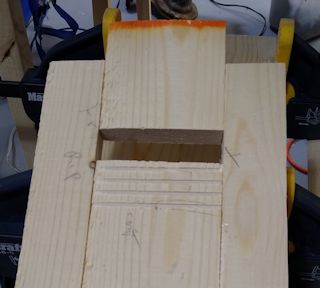
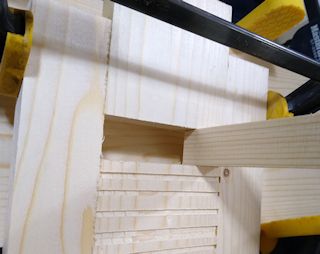
Make a spacer of the exact height that the opening should be. It comes in handy when gluing the front up. Note the pictures below. Make sure to put the pieces the way they were before the cut. That will maintain the slot measurement. Also note the saw cuts for a ladder.
If the house will be in danger of house sparrows you can make the slot as small as 7/8" or 22mm tall. For mountain bluebirds a slot of 1 3/16" should keep starlings out. BUT it will not keep house sparrows out. Bluebird houses should be at least 1/4 mile or .4 kilometers from farm sites.
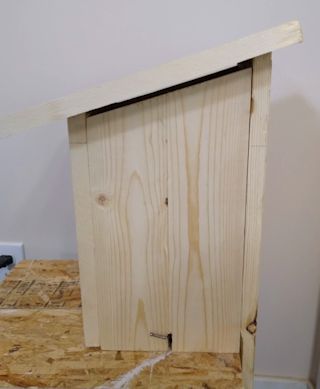
After the glue has dried it is time to final trim the pieces. And assemble the box.
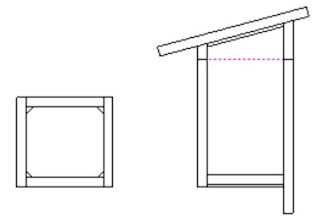
Install both sides 1/4" or 6-7mm from the roof for ventilation.

To help explain how to find the exact hinge location, use a square to transfer the location from front of box to the back. The dotted line would be the square edge.
Install the door side last. Use a square to locate the hinge screws. You won't need the clamp here. I'm using it to hold the square while I take the picture.
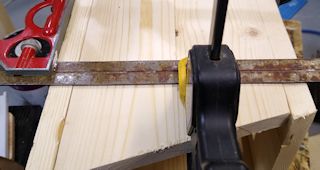
Another look at how a square is used to have the pivot screws lined up.
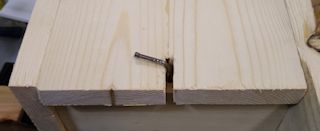
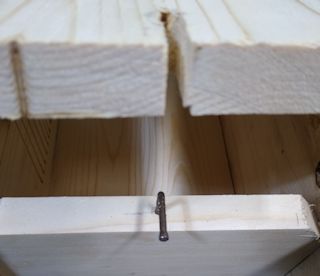
I like a bent nail for a latch. Using a angle hole with a removeable nail seems risky for losing the nail. A bent nail is simply lined up with the cut out in the door. I find it useful to drill a small pilot hole for the nail. Then I bend the nail before inserting it, which is done by twisting it in with pliers.
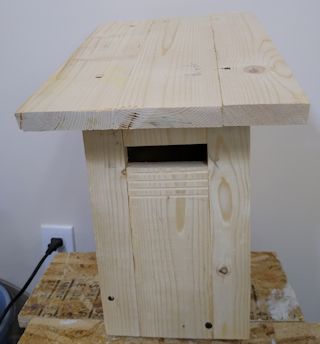
Here it is, a Swallow nest box ready to be placed for occupancy.